They give a protective coating to the surface which preserves and protects the materials used in building from weather effects such as rain water, heat , frost etc.
They provide decorative finishes or effects which add to the appearance of material surfaces and building as a whole.
PLASTER
Plaster, is basically a cementitious material or a combination of materials and aggregates, which, when mixed with a suitable amount of water (or in some cases, other liquid), forms a plastic mass which, when applied to a surface, adheres to it and subsequently sets or hardens, preserving in a rigid state the form or texture imposed during the period of plasticity.
Uses:-
Plaster is used to protect the actual structure of the building i.e. the masonry or the RCC units, from exposure to changes in weather. It is used a weatherproofing sealant, to protect against wind, rain and sun.
It is used as a sanitary coating, to fill any gaps in the wall, so as to keep vermin and insects out of the structure.
Plaster is used as a leveling coat, to make walls and ceilings smooth either for their own aesthetic appeal or a base for application of paint and polishes.
It is also a layer for preliminary defense against fire and plays and important role in fireproofing a building.
Components of Plaster
All plaster ideally comprises of 3 materials
a) Binder: The substance, which basically holds together the layer or the coat
E.g. Lime (is the oldest used binder), Cement and Gypsum
b) Aggregate: This comprises of the actual bulk of material in the layer or the coat
E.g. Various types of sand. The size of grains varies as per requirements and availability
c) Water
For external finish preferred plaster thicknesses are 15 m,18mm and 20mm.
15 mm LIME PLASTER -shall be done on the rough side of single or half brick wall. The average thickness of plaster shall not be less than 15mm and the minimum thickness of the plaster at any place shall not be less than 10mm.
Preparation of Surface :
The joints should be raked out properly. Dust and loose mortar shall be brushed out. The surface shall then be washed and kept wet before plastering is commenced.
In case of concrete surface if a chemical retarder has been applied to the form work, the surface shall be roughened by wire brushing and all the resulting dust and loose particles cleaned off.
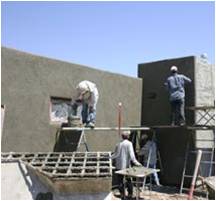
Plastering shall be started from the top and worked down towards the floor. All put-log holes shall be properly filled in advance of the plastering as the scaffolding is being taken down.
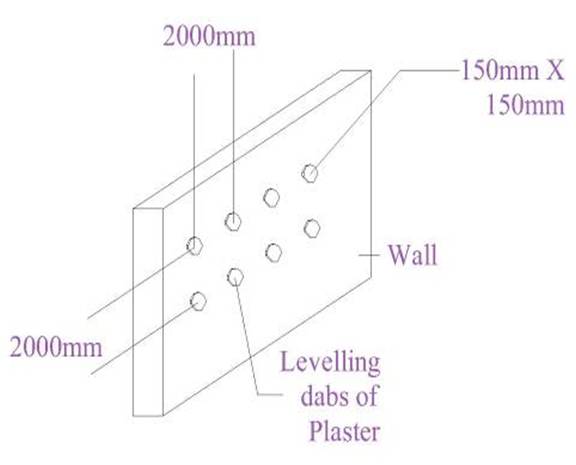
To ensure even thickness and a true surface, plaster about 15cm X 15 cm shall be first applied, horizontally and vertically applied, at not more than 2 meters intervals over the entire surface to serve as gauges. The surfaces of these gauges shall be truly in the plane of the finished plaster surface. The mortar shall then be laid on the wall, between the gauges with a trowel. The mortar shall be applied in a uniform surface slightly more than the specified thickness. This shall then be beaten with thin strips of bamboo about one meter long to ensure thorough filling of joints, and then brought top a true surface, by working a wooden straight edge reaching across the gauges, with a small upward and side ways movements at a time.
Curing:
Curing shall be started 24 hours after finishing the plaster. The plaster shall be kept wet for a period of seven days. During this period, it shall be suitably protected from all damages as the contractor’s expenditure by such means as the Engineer-In-Charge may approve. The dates on which the plastering is done shall be legibly marked on the various sections plastered so that curing for the specified period thereafter can be watched.
18mm Plaster (Two Coats Work)
Application of plaster -The plaster shall be applied in two coats i.e.. 12 mm under coat and then 6mm finishing coat and shall have an average final thickness of not less than 18mm.
12 mm Under Coat:
This shall be applied in the same manner as specified under 12mm lime plaster except that the finishing after the mortar has been brought to a level with the wooden straight edge, shall be done with a wooden float only during the process lime putty solution shall not be applied.
The surface shall be further roughened, by furrowing, about 2mm deep with a scratching tool diagonally, both ways to form a key for the finishing coat. The scratched lines shall not be more than 15cms apart. The surface shall be kept wet till the finishing coat is applied.
6mm Finishing Coat:
The finishing coat shall be applied a day or two after the under coat has set. The latter shall not be allowed to dry out, before the finishing coat is laid on. The finishing coat shall be applied in a uniform thickness of slightly more than 6mm.The method of application shall be as described earlier except that the surface shall not be beaten with bamboo strips. The final thickness of the top coat shall be 6mm.
COSTING
20 mm plaster
As the plaster is thick, 20% of mortar may be taken to fill up the joints,uneveness.
The quantity of wet mortar = 100 x .02 +20% = 2.4 cu.m.
For dry vol, increase by 25% = 2.4+.6 = 3 cu.m.
For different mixes the ratio of cement and sand are:
mix cement sand
Cement mortar 1:2 1 cu.m. (30 bags) 2 cu.m.
Cement mortar 1:3 .78 cu.m. (23.4 bags) 2.3 cu.m.
Cement mortar 1.6 .46 cu.m. (13.8 bags) 2.54 cu.m.
For rich mortar generally coarse sand is used for greater strength.
Cost of cement / cu.m. = 2790 Rs
Cost of coarse sand/ cu.m. = 200 Rs
Therefore for cement mix of 1:2 :-
Cement cost = 2790 x 1 = 2790 Rs
Sand cost = 200 x 2 = 400 Rs
Total cost of mix for 100 cu.m. of surface = 3190 Rs + water charges.
Smooth toweled cement plaster finish
MORTAR
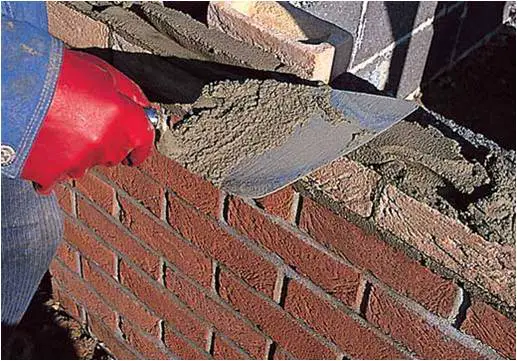
- MORTAR Is a material used in masonry to fill the gaps between blocks in construction.
- the blocks may be stone, brick, breeze blocks (cinder blocks), etc.
- mortar is a mixture of sand, a binder such as cement or lime, and water and is applied as a paste which then sets hard.
- mortar can also be used to fix, or point masonry when the original mortar has washed away.[1]
TYPES OF MORTAR
- Gypsum mortar
- Portland cemnet mortar
- Lime mortar
- Pozzolona mortar
DRY MORTAR :
White / colored cement is mixed with marble powder and then with marble chips to obtain dry mortar as per raw material proportion.
Pigment should be mixed with white cement and dispersed thoroughly for preparing colored cement , before mixing marble chips.
This colored cement then should be sieved through a fine ‘malmal’ cloth to obtain uniform shade.
WET MORTAR :
Mix slightly less than half volume of water in one volume of dry mortar. (Approx. Water / cement ratio 0.41).
Mix well to get uniform thick and workable consistency.
Wet mortar should be consumed within an hour.


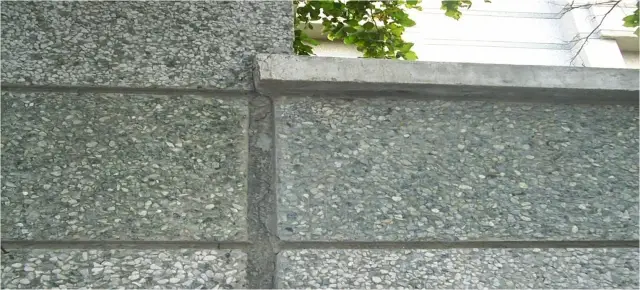
Fine exposed aggregate texture
- The earliest known mortar was used by the ancient egyptians and was made from gypsum. this form was essentially a mixture of plaster and sand and was quite soft.
PORTLAND CEMENT MORTAR
- Portland cement mortar (often known simply as cement mortar) is created by mixing portland cement with sand and water.
- This is a mixture of 1 cement : 3 sand (generally) or 1:6 can also be used for general walling. brickwork built in cement mortar is much stronger than that in lime mortar.
- It was invented in the mid-nineteenth century, as part of scientific efforts to develop stronger mortars than existed at the time. it was popularised during the late nineteenth century, and by 1930 it had superseded lime mortar for new construction. the main reason for this was that it sets hard and quickly, allowing a faster pace of construction. however, as a general rule, it should not be used for the repair of older buildings constructed in lime mortar, which require the flexibility, softness and breathability of lime if they are to function correctly.
- The portland cement mortar is the basis for concrete, a mixture usually composed of this particular mortar with the addition of gravel.
POZZOLANA MORTAR
- Pozzolana is a fine, sandy volcanic ash, originally discovered and dug in italy at pozzuoli in the region around mount vesuvius, but later at a number of other sites. the ancient roman architect vitruvius speaks of four types of pozzolana. it is found in all the volcanic areas of italy in various colours: black, white, grey and red.
- Finely ground and mixed with lime it acts like portland cement and makes a strong mortar that will also set under water.
LIME MORTAR
- Lime mortar is created by mixing sand, slaked lime and water.
- The earliest known use of lime mortar dates to about 4000 bc in ancient egypt. lime mortars have been used throughout the world, notably in roman empire buildings throughout europe and africa. the vast majority of pre-1900 masonry buildings in europe and asia are built from lime mortar.
- The process of making lime mortar is simple. limestone is burnt in a kiln to form quicklime. the quicklime is then slaked (mixed with water) to form slaked lime, either in the form of lime putty or of hydrated lime powder. this is then mixed with sand and water to form mortar.
- This kind of lime mortar, known as non-hydraulic, sets very slowly through reaction with the carbon dioxide in air. a very thick wall made of lime mortar may take centuries to completely set and harden. this is normal and not problematic.
- The speed of set can be increased by using impure limestones in the kiln, to form a hydraulic lime that will set on contact with water. such a lime must be stored as a dry powder. alternatively, a pozzolanic material such as calcined clay or brick dust may be added to the mortar mix. this will have a similar effect of making the mortar set reasonably quickly by reaction with the water in the mortar.
- Using portland cement mortars in repairs to older buildings originally constructed using lime mortar can be problematic. this is because lime mortar is softer than cement mortar, allowing brickwork a certain degree of flexibility to move to adapt to shifting ground or other changing conditions. cement mortar is harder and allows less flexibility. the contrast can cause brickwork to crack where the two mortars are present in a single wall.
OPTIMUM MORTAR MIXES FOR DIFFERENT GRADES OF BRICKS�
|
SNO
|
BRICK STRENGTH
|
MORTAR MIX PROPORTION(BY VOL
|
Designation as per ISI
|
|
1
|
<50
|
1CEMENT:6SAND
1CEMENT:2LIME:9SAND
|
M2 (medium strength mortar)
|
|
2
|
50-149
|
1CEMENT:5SAND
1CEMENT:1LIME:6SAND
|
M1 (medium strength mortar)
|
|
3
|
150-249
|
1CEMENT:4SAND
1CEMENT:1/2LIME:4SAND
|
H2 (high strength mortar)
|
|
4
|
250 or above
|
1CEMENT:1/4LIME:3SAND
|
H1 (high strength mortar)
|
|
5
|
For very low strength bricks
|
1CEMENT:8SAND
1CEMENT:3LIME:12SAND
|
L1 (light or weak mortar)
|
QUANTITIES FOR 1CU.M OF CEMENT MORTAR
FOR CALCULATIONS.
Volume of dry mortar =1.3 x volume of wet mortar hence for y cu.m of mortar the volume of dry mortar is 1.3 x y.in proportions of the mix.
FOR SPECIFICATIONS:
simply state the thickness of mortar, the proportion and band
such as
flush, sunk, raised and moulded
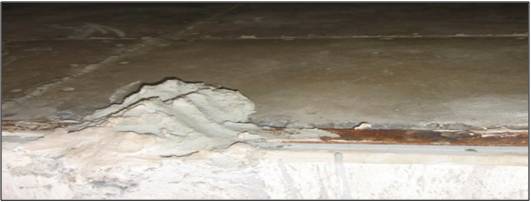
POINTING
- Mortar joints are considered as the weakest spots in masonary.
- Pointing refers to raking out joints in brickwork of upto a depth of 13mm and then filling with a mortar of slightly richer mix. pointing should be done using cement or lime mortar
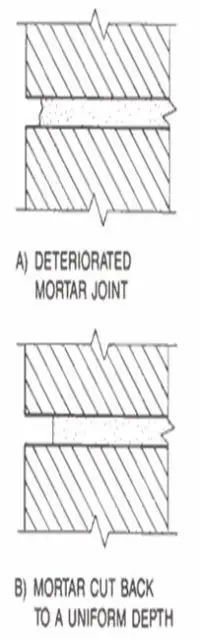
MORTAR JOINTS ARE CONSIDERED DETERIORATED WHEN
- They have eroded back more than 1/4″ from the face of the unit or beyond the depth of the original joint
- Cracks are visible within the mortar
- The bond between brick and mortar is broken or the mortar is soft and/or crumbling
- Any portion of a mortar joint is missing
THE DETERIORATION OF MORTAR IS CAUSED BY ANY OR ALL OF THE FOLLOWING FACTORS:
- When excessive moisture can enter a wall and freeze repeatedly, spalling of the mortar and brick will occur due to the expansive nature of frozen water. the sources of moisture entry, beyond normal exposure include leaks in flashing, gutters, lintels, sills, and sealant joints
- Older buildings were commonly built without adequate expansion joints and cracking occurs when building movement, from thermal expansion, is not provided for. all clay products (brick) grow in long term service while concrete products shrink.
- Uneven settlement in a building’s foundation may occur resulting in cracking.

TYPES OF POINTING
- Flush pointing- the finish is flush with the edges of bricks or stone. it gives a neat appearance and is the simplest type of ponting.
- Cut or weathered- sloping finish of the mortar from top to bottom.
- Grooved pointing- a groove is made by shaping of a steel rod.
- Keyed or grooved-a groove is formed by running a bent up steel rod.
- Tuckpointing-a raised band of 6x10mm is formed by pressing the end of the joint.
- Beaded pointing- in this mortar is pressed by a suitably shaped rod along the centre line of the groove.
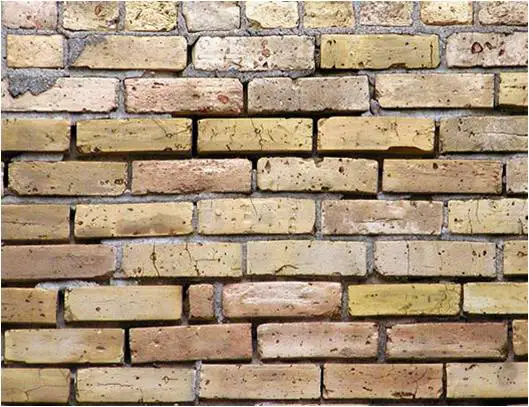
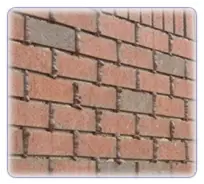
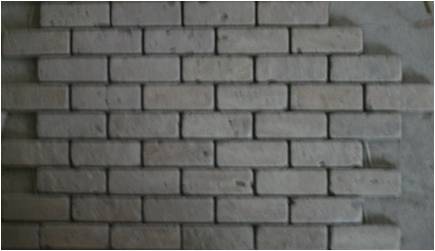
BRICK CLADDING
Brick is an artificial stone made by forming clay into rectangular blocks which are hardened, either by burning in a kiln or sometimes, in warm countries, by sun-drying .
Brick has continued to be commonly employed as cladding, in the face of competition from more modern and technologically sophisticated materials, is evidence enough that its non-structural qualities — reasonable cost, flexibility, durability, impact resistance, and visual appearance — continue to be valued.
Application:
- Commercial developments
- Schools and Libraries
- Modular Accommodation
- Social Housing
- Healthcare Facilities
- Student & Key worker Accommodation
- Hotel & Leisure Facilities
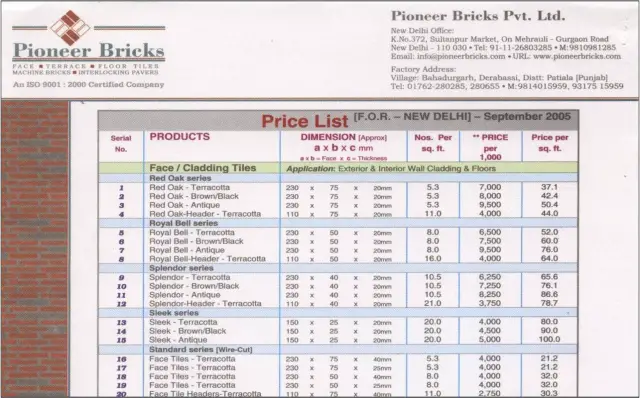
Specifications:
- Dimension : 230 x 75 x 20mm
- Compressive Strength : 520kg/cm2
- Water Absorption : 5.6%
- Efflorescence : NIL
- No. of tiles per sq.ft. : 5.3
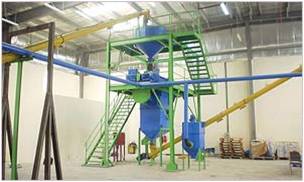
Cement manufacture factory
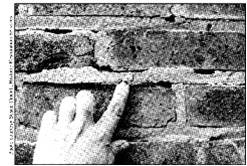
Differential expansion and contraction rates have this portland-rich mortar popping out-damaging the brick in the process.
SURFACE PREPARATION
Old plastered surface : the base plaster should be rough. To obtain roughness, surface of old masonry plaster is chipped and washed thoroughly with water to remove dust or dirt.
New Plastered surface : surface should be combed properly, cleaned and cured before application of finishing plaster.
Smooth brick /stone work : A base plaster of ordinary cement mortar (1:3) using 2% waterproofing compound is applied. Immediately base plaster is made rough by combing. Based plaster is allowed to dry and then cured thoroughly . Grit wash plaster can be applied after 24 hours of application of base plaster.
Rough brick/ stone work : Two layers of ordinary cement plaster are applied. Thickness of second layer should be about 8mm. Method of preparation of mortar and treatment of surface will be same as for smooth brick/stone work.
APPLICATION
Cure prepared surface thoroughly. Divide surface by marking it in suitable panel sizes and shapes. Area of each of panel should not be more than 2 mtr. Sq.
To shape panels and to give expansion joints, it is necessary to fix tapered wooden strips of 6-8mm width or U shaped aluminum/pvc channel of the same size. These are called baton strips.
Prepare neat cement or colored cement slurry. Brush it within the panel shortly before application of grit wash plaster. Wet mortar is then applied with trowel. After about 30 minutes, it is re-troweled. At this stage, surface should be made smooth covering all aggregate particles with skin of cement.
Surface is washed after the coat has partially hardened. Water is poured lightly on the surface and rubbed simultaneously with a soft nylon brush t expose aggregate particles. Initial rubbing helps in removing skin of white cement and subsequent rubbing with washing, exposes aggregate particles. During rubbing, water should be poured on surface simultaneously to wash away cement. Wooden strips should be taken out after washing is completed. Aluminum channels can be left embedded in plaster, If so desired.
Time of washing is most important and its determination requires experience as same is affected by temperature and other atmospheric conditions. If washing is done early, aggregate particles will start falling down. If washing is delayed, it will become difficult to expose aggregate particles.
CURING
Finished plaster should be cured thoroughly 3-4 times a day at regular intervals. Such curing should be continued for 3-4 days.
Although grit wash is itself damp proof but it is better to apply a coat of silicon paint, as it increases the life of grit wash and provides damp proof coating as well.
Advantages:
- Better Aesthetics
- Good Thermal Insulation
- High Compressive Strength
- Low Water Absorption
- No Efflorescence
Drawbacks:
- Due to inherent nature of clay, products will have minor variations in colour & dimensions.
- Minor chipping and cracks are inherent in clay products.
- Colors will be shades of natural terracotta unless otherwise mentioned.
- Actual colors may be different from the pictures shown here due to printing, photography and scanning of pictures.
- samples should be checked before purchasing.
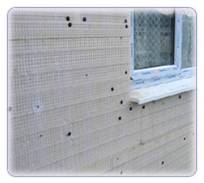
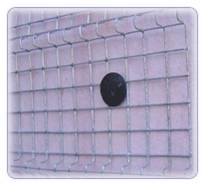
Insulation boards are mechanically fixed to sound existing substrate
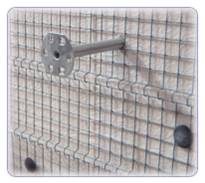
Detail: Galvanised mesh is then secured with a permanent mechanical fixing
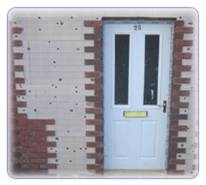
Detail: Setting out around a door opening
Specialist profiled galvanised brick mesh�is temporarily fixed to the insulation boards
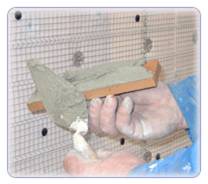
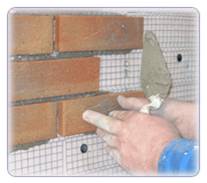
Butter brick slip with adhesive
Apply pointing mortar
Detail: Temporary ‘Firtree’ Fixing
mesh creates a natural brick coursing and joint width, which enables the installer to achieve perfectly level courses
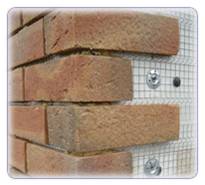
Pistol corner bricks are also available for�building corners and to return the system�into window and door reveals
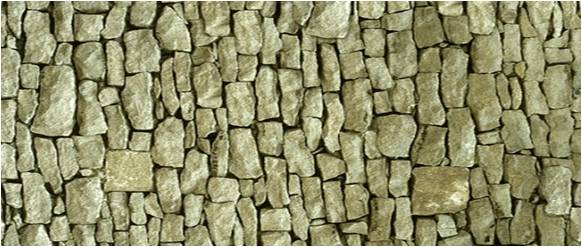
STONE CLADDING
Stones have always been a favorite of the designers for the purpose of floorings, wall claddings and ornamental works due to the following factors:
- The visual and aesthetic appeal of the stone,
- Availability of a wide variety of stones in abundance,
- Attractive and durable,
- Strong and water-resistant
- Scratch and stain proof
The commonly used stones for wall cladding in India are
- Granite
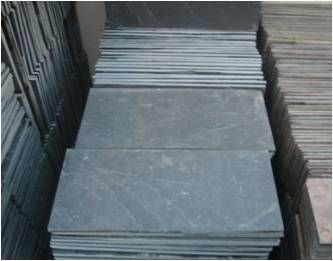
- Kota stone
- Sand stone
- Slate
- Marble
FEW GENERAL COSTS :-
Few rates are common for all types of stone like:
- Transportation to site (vehicle) : 60-100 Rs./km
(labour):: 100-150 Rs./person on site
- Fixing of stone : 10 Rs./sq. ft
- Polishing (at site) : 8- 10Rs./sq.ft.
(at shop) : 7 – 9 Rs./sq.ft
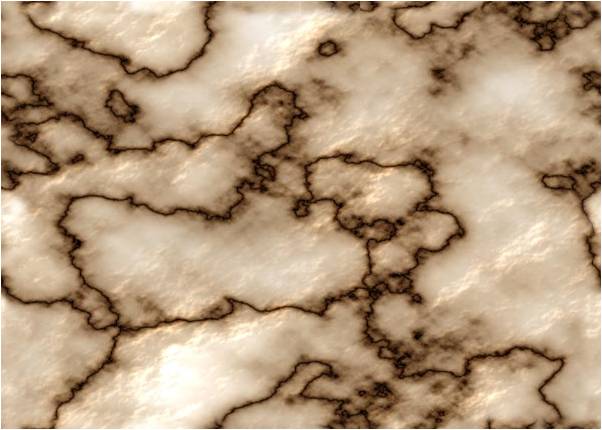
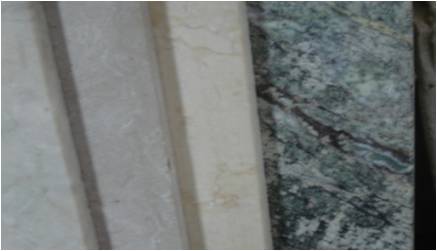
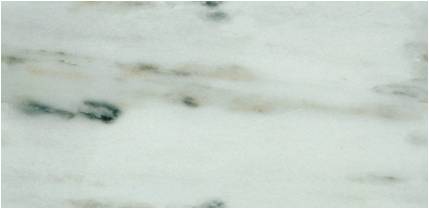
MARBLE
Characteristics
- Marble is a variety of metamorphosed limestone.
- It is crystalline in nature.
- Capable of taking a high polish.
- The variegated patterns of colours in different types is due to the varying amounts of impurities.
- The surface crumbles readily when exposed to moist, acid atmosphere,
- Durable in a dry atmosphere and when protected from rain
Availability
- Mainly quarried in parts of Rajasthan, U.P., Haryana etc.
Sizes
- Available in slabs of 8’ x 4’ and 4’ x 4’.
- The thicknesses available are 3/ 4 ‘’ , 1’’ , 1 ½ ‘’ and 2’’.

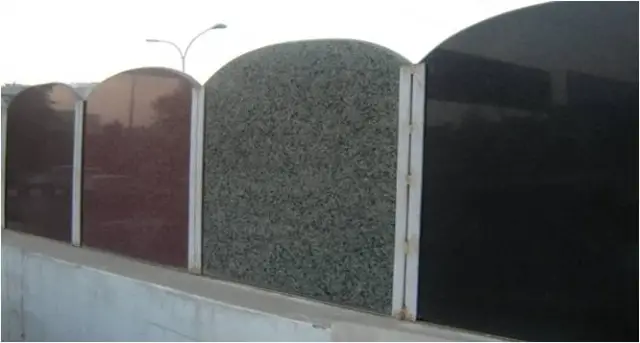
GRANITE
CHARACTERISTICS
- Granite is a durable coarse-grained, sedimentary rock
- Natural granite is an extremely hard and tough material.
- It is stronger than sandstone, limestone, and marble.
- It is correspondingly more difficult to quarry.
- The best grades are extremely resistant to weathering.
- It retains polish (can be mirror polished).
- The maintenance cost is practically nil.
AVAILABILITY
Granite mostly comes from the Deccan – major dealers being established in Bangalore. The available granite is pre-polished.
SIZES
The stone for cladding is available in the forms of slabs and tiles. The size depends on the size of the quarried block. The most common being 8’ x 4’ and 4’ x 4’. Slabs are available up to 32” X 8’. Tile are available in sizes of 1’ X 2’ and 1’ X 1’. The thicknesses available are 20mm, 30mm, 40mm. The most common being 20mm. Tiles are 12mm thick.
|
TYPE
|
RATE
(Rs./sq.ft)
|
|
black
|
170
|
|
Ruby red
|
130
|
|
Lakha red
|
240
|
|
Cats eye
|
135
|
|
Silver grey
|
100
|
|
Levander blue
|
145
|
|
Forest green
|
65
|
|
SIZES
|
RATES(Rs./tile)
|
|
12’’ x 6’’
|
40
|
|
12’’ x 3’’
|
30
|
|
2’ x 1’
|
80
|
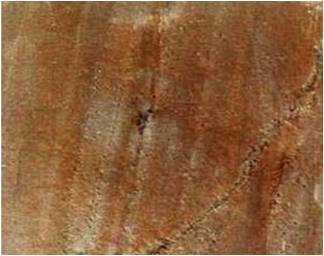
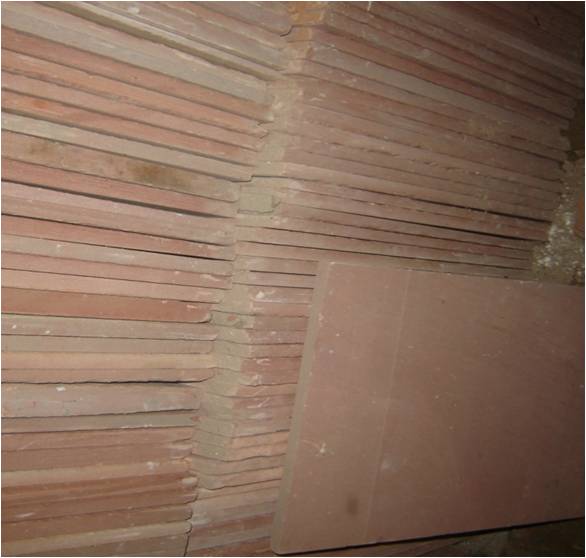
SANDSTONE
CHARACTERISTICS
Sandstone has been extensively used in historic Buildings
all over India, by the Mughals and is still used because
- Its softer than marble and granite,
- Carving is easier since it is soft
- Durable and
- Does not require any kind of polish.
- The common finishes are sawn and diamond sawn.
SIZES
It is commonly available in two varieties. Known as Agra
(Deep Red) and Dholpur (pink).The nominal thickness available
is ¾”, 1”, 1 ½” 2”. The sizes available are 5’ X 3’, 6’ X 4’.
Cut sizes are available in 2’ X 2’, 2 ½’ X 2’, 1 ½’ X 2’.
|
TYPE
|
RATE (Rs./sq.ft)
|
|
One side smooth
|
Both sides smooth (gangsaw cut)
|
|
Agra
|
10
|
24
|
|
Dholpur
|
13.5
|
28
|
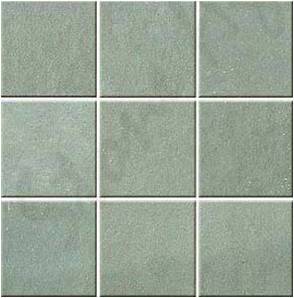
KOTA STONE
CHARACTERISTICS
- The kota stone is brought from Jhalawar district and few other parts in Rajasthan..
- It is hard and water-proof in nature
- It comes in two shades-grey and brown..
- The finishing done is smooth.
RATES
The rate varies from 14-25 Rs/SQ FT
|
Type
|
size
|
Rate
(Rs./tile)
|
|
Grey
|
22’’ x 11’’
|
12.5
|
|
22’’ x 22’’
|
20
|
|
Brown
|
22’’ x 11’’
|
14
|
|
22’’ x 22’’
|
22
|
Fixing of stone by metallic clamps
- It is the best way of cladding stone on external surfaces.
- This involves rough plastering the surface which is to be cladded.
- Clamping the stone with stainless steel or gun-metal clamps.
- Pasting the stone with cement mortar (1:4).
- Thicker stone have to be used for clamping.
- Costs of fixing are up to Rs. 40/sqft.
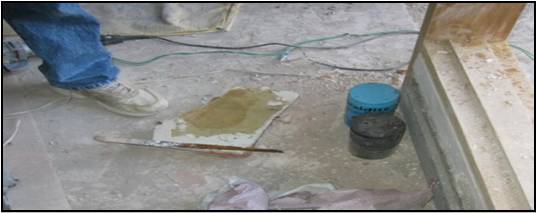
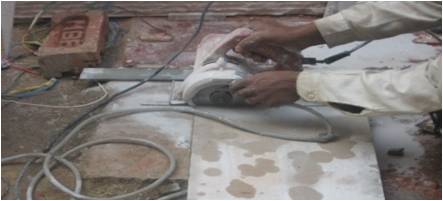
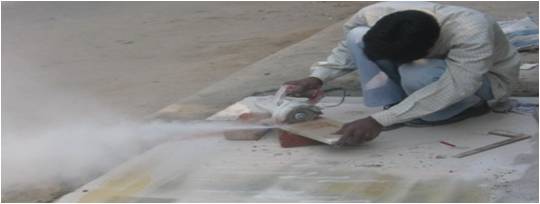
Cladding is done after plastering, in three steps-
- cutting of stone
- fix it on the wall with the help
- of adhesive and plaster of paris
- after some days remove pop
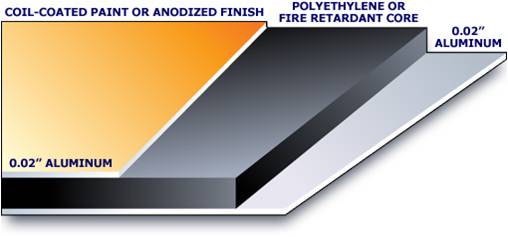
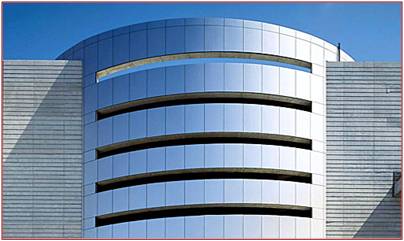
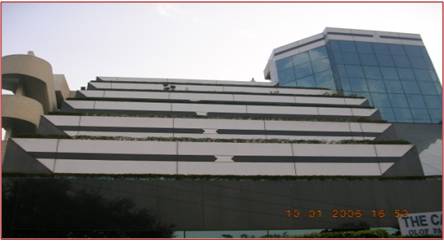
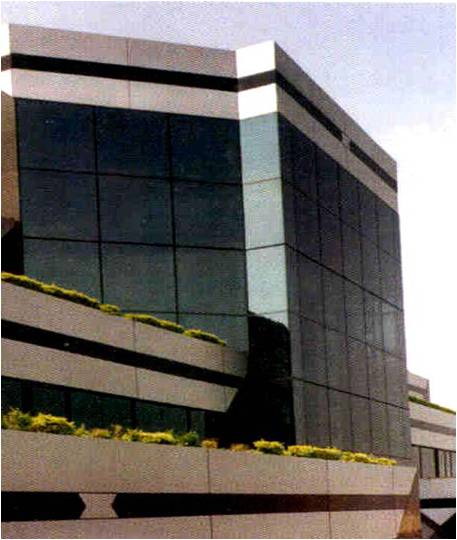
ALUMINIUM COMPOSITE PANEL
Aluminium Composite Panel is made out of two Aluminium skins, which are precoated and thermally bonded to each side of non-toxic polyethylene core. Adhesion achieved by combination of chemical and mechanical actions. The low maintenance combination of corrosion-resistant aluminum skins and weather-resistant finishes is precoated with PVDF 70/30 (Polyvinylidene fluoride) coating, which is the most advance coating used in building sector because of its excellent stability over the time in all respect. Where as the inner aluminium skin is precoated with a service coat to protect the inner skin from either alkali attack from cement or galvanic corrosion from steel.
Aluminium composite panels weigh 3.4 times less than steel and 1 times less than aluminium and yet compete equally when it comes to rigidity.
Aluminium blind rivet & stainless steel bolt / nuts are recommended to fasten Panels
Composition
Front side : Aluminium roll-coated with 70% + PVDF�Core : Anti-toxic low density polyethylene�Rear side : Aluminium coated with chrome or polyester�PVDF : Polyvinylidene fluoride �Thickness : 1mm to 6mm
Sheet size : 1220mm x 2440 mm
1220mm x 3050mm
1220mm x 3660mm

ADVANTAGES:
- Light weight, ultra modern look
- Saves construction time and cost
- Sound insulation
- Pollution resistant
- Acid, alkali and salt spray resistant
- Resistant to blow and breakage
- Good thermal insulation
- Able to bent, cut, drilled, punched, stamped and shaped into complex shapes
- Excellent UV characteristics, retains colour after long exposure
- Resistant to blow and breakage
- Can be cleaned easily
- Varieties of colours for different usage as well as looks
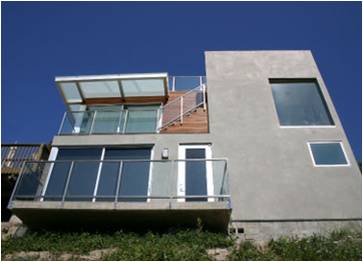
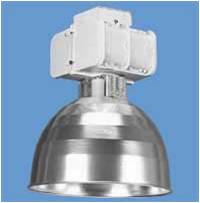
SALIENT FEATURES
Water & Corrosion Resistant
Minimum Dead Weight
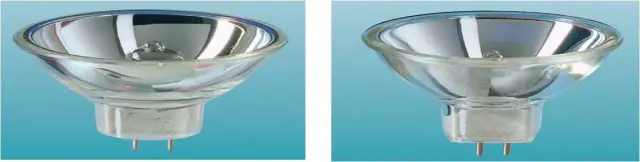
High-Tech materials – fibre optics
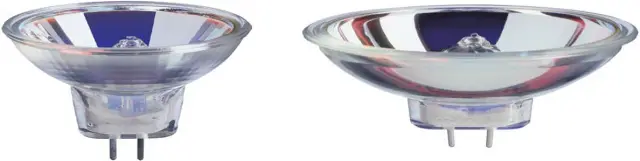
Fibre Optics – Low voltage halogen
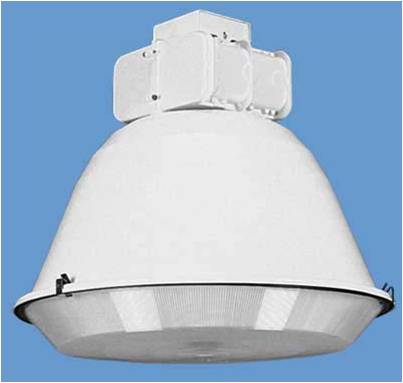
Features
1. Integral reflector
2. Dichroic coating on glass reflector
3. Precisely aligned halogen burner
Benefits
1. Efficient mirror condensor system
2. 75% of the heat is generated backwards keeping temperatures within safe limits
3. No re-alignment necessary when lamp is replaced
Dimming of low voltage halogen lamps
Low voltage halogen lamps should not be dimmed by more than 10% of their rated voltage since this will result in a reduction in life.
Standard tungsten filament lamps (with no halogen filling), can be dimmed to zero volts, resulting in virtually endless life. However if low voltage tungsten halogen lamps are dimmed by more than 10%, the lamp will be operating at a too low temperature and the free halogens in the gas fill, will attack the cooler parts of the tungsten filament i.e. where enters the quartz or glass envelope. The wire at that point will then be eroded and eventually will fail.
So if dimmed by 10% or more, low voltage tungsten halogen lamps will not have an extended life but are unlikely even to reach their rated life.
Fibre Optics – Low voltage halogen
Glossary of Fibre Optic Terms:
Fibre : single strand of glass or plastic drawn from a rod and tube of material with significantly differing refractive index
Bundle: a collection of fibres brought together within a sheath of protective material to create a single light guide
Harness: a group of bundles brought together and fed from a single light source or port
Tail: Output end of a single bundle in a harness
Common End: The collected ends of bundles in a harness brought together at the light source
Light source: lamp holder and optical elements which may include effects or colour changer that feed light into a harness
Randomised: a harness where the individual fibres within the bundles are evenly distributed across the common end. This is required where significant difference of light output between different tails is unacceptable
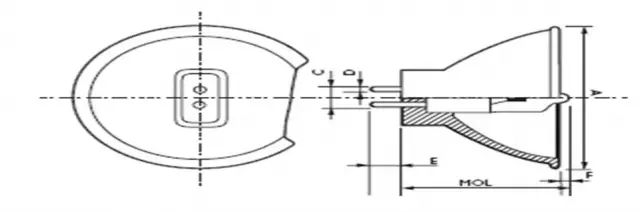
GZ4 smooth 35 mm GX5.3 smooth 50 mm GX5.3 specular 50 mm
GZ6.35 specular 50 mm 13137/FHX
14558 6847 FO
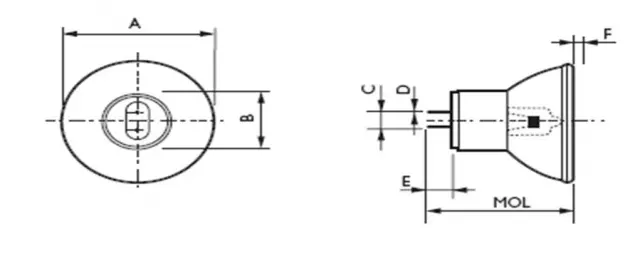
TypeANSI
CodeJ
CodeMOLA
maxB
nomCDE
nom
min/maxF
max
– JCR/M 6V 10W H20-3 36 35,84 Ø 16 Ø 4 1 ± 0.5 6 2
14558 – 40 35 Ø – 4 1 ± 0.5 6 / 11.5 < 0 JCR/M 6V 20W-2 36 35,8 Ø 16 Ø 4 1 ± 0.05 4.8 min 1 JCR 12V 20W A20H/3 38 35,8 Ø 16 Ø 4 1 ± 0.05 5 min 3 JCR 12V 22W/3 36 35 Ø 17 Ø 4 1 ± 0.05 6 min 3 13390 – 32 35 Ø 17 Ø 4 0.7 6 min 1 13137 FHX – 45 51 Ø – 5.3 1.5 – –


Excellent Information.
Excellent Information. Thanks!